
Table of contents
Overview
This article covers the setup and installation process for the different Entagged models (M, N1, N2), focusing on connecting the magnetic USB plug, positioning HDMI/USB cables, and ensuring proper functionality through compatibility checks. Unique installation details for each model are included.
Setting Up Your Entagged Device
Before you begin, ensure you have the correct Entagged model, USB or HDMI cable, and magnetic plug (if applicable) for your camera. You can check the Entagged compatibility list.
Disable the following settings before plugging in your Entagged device (if available on your camera):
- ✓USB charging
- ✓Built-in WiFi
- ✓FTP Upload
- ✓LAN
- ✓Tethering
Please note: In this article, "USB" refers to USB-C, Micro-USB, Mini-USB, and USB-8P ports and cables. Similarly, "HDMI" will refer to standard HDMI (HDMI-A), Mini-HDMI (HDMI-C), and Micro-HDMI (HDMI-D) ports and cables. The type of cables needed depends on your camera model, which is why providing this information is necessary when purchasing your Entagged device. The setup process and outcome are the same.
Canon Setup
| 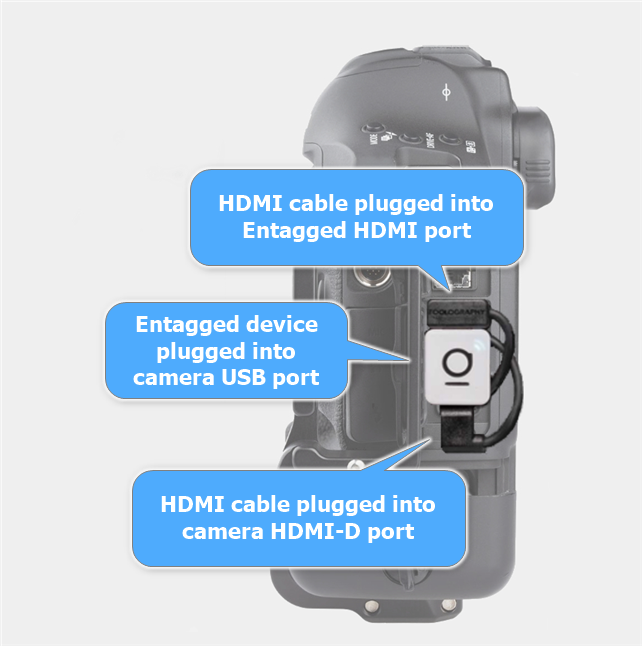 |
If your camera has a Micro-USB 3.0 port: The Micro-USB 2.0 magnetic plug is backward compatible and fits into the wider half of the Micro-USB 3.0 port.
Nikon Setup
The instructions for plugging your Entagged device into your Nikon camera depend on the model of your Entagged device.
N1 Model
If your camera has a Micro-USB 3.0 port: The Micro-USB 2.0 plug is backward compatible and fits into the wider half of the Micro-USB 3.0 port. | 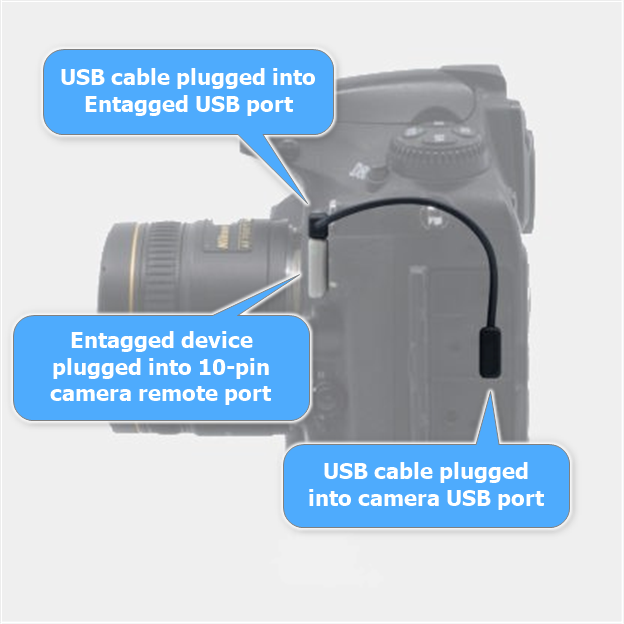 |
N2 Model
If your camera has a Micro-USB 3.0 port: The Micro-USB 2.0 plug is backward compatible and fits into the wider half of the Micro-USB 3.0 port. | 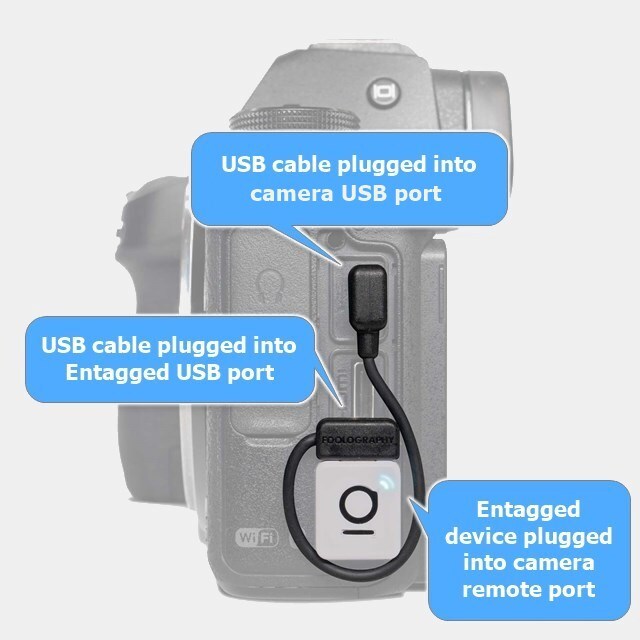 |
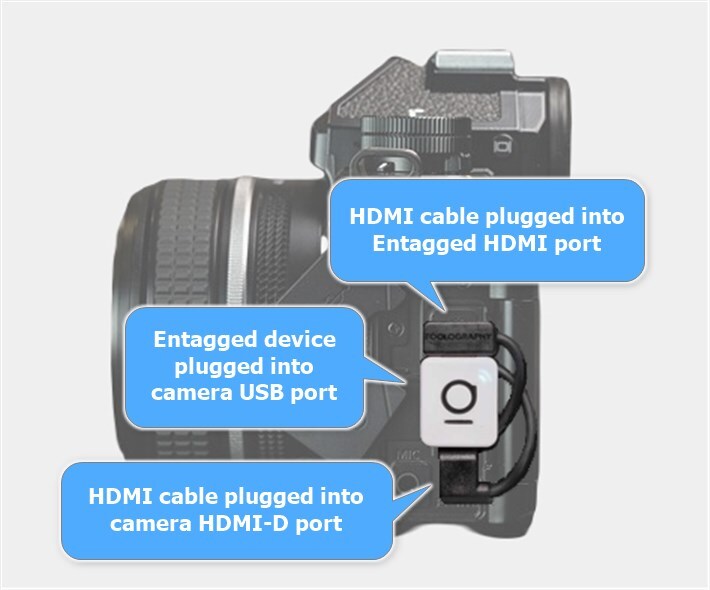
M Model
|  |
Sony Setup
| 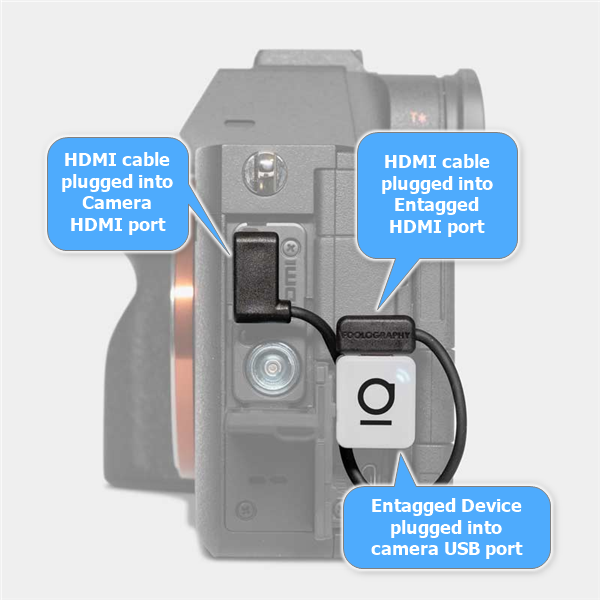 |
If your camera has a Micro-USB 3.0 port: The Micro-USB 2.0 magnetic plug is backward compatible and fits into the wider half of the Micro-USB 3.0 port.
Fujifilm Setup
| 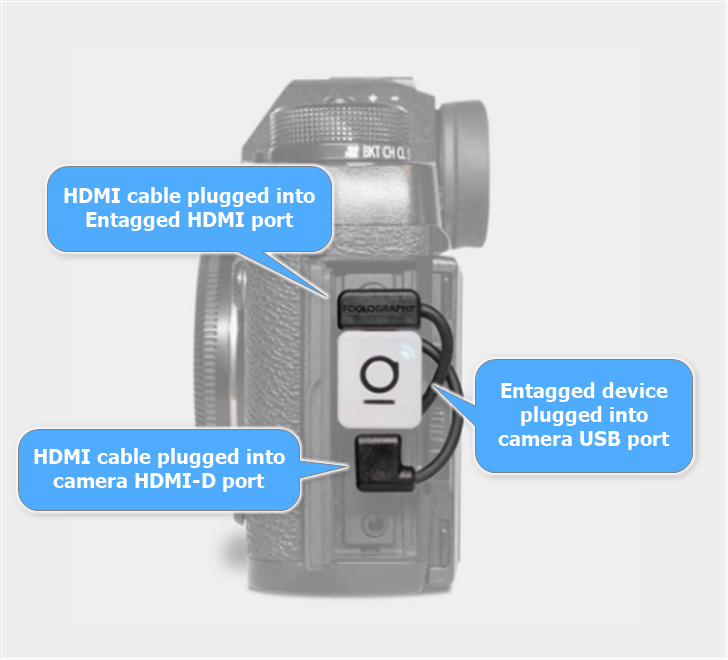 |
If your camera has a Micro-USB 3.0 port: The Micro-USB 2.0 magnetic plug is backward compatible and fits into the wider half of the Micro-USB 3.0 port.
After correctly plugging your Entagged device into your camera, it's now time to pair your device with your phone or tablet.
The Takeaway
By following these steps, you've successfully plugged in your Entagged device, ensuring a secure and functional connection to your camera. You're now ready to pair your Entagged device with your Entagged app and/or a barcode scanner to enhance your photography workflow.